Ubuntu 22.04 | Install and configure an OpenLDAP Server
Adventures in the LXD Lab | Authentication Services
Tinkering is what I do but this article goes a bit beyond tinkering and into the realm of a Rube Goldberg machine for my lab.
LDAP stands for Lightweight Directory Access Protocol which as to say that it is the protocol used to access an LDAP database. An LDAP database, in-turn is a database of objects on your network. This can be just about anything, but most commonly the database will contain items such as users, groups, computers, printers and network resources such as shared folders. LDAP is also used for authenticating users and devices and granting the appropriate access rights to those resources. This is commonly accomplished using RBAC (Role Based Access Control) principals leveraging groups of which users are members that are granted access. The most widely known and used LDAP implementation is Microsoft’s Active Directory. Since I am not a ‘Microsoft Guy’ (though I play one on T.V.), I am going to configure OpenLDAP. OpenLDAP, as the name suggests is a flexible, scalable and widely used implementation of the LDAP protocol and directory server.
Preparing The Server
As with all of the servers in my lab, this one was built using the standard Ubuntu 22.04 (Jammy Jellyfish) image and launched on my LXD host with the following command:
# Launch a new Ubuntu image to be my LDAP server
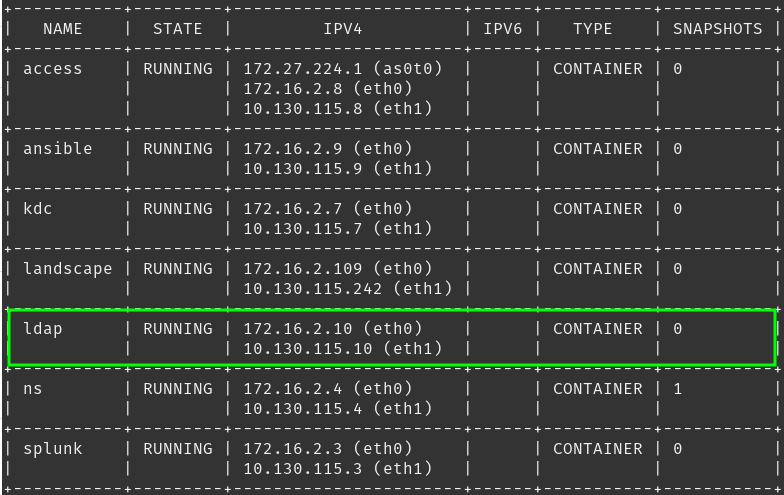
jason@lxd01:/$ lxc launch images:ubuntu/22.04 ldapWith most deployments/installations, there is some ‘pre-work’ that has to be done for the application or service that you are deploying to work as expected. This includes patching the machine and setting the desired parameters, such as hostname. Below are the standard pre-flight items that I configure in my lab. This will vary depending on your setup and needs.
# Gain initial access the instance console.
jason@apollo:/$ lxc exec ldap bash

# Set the desired hostname.
root@ldap:/# hostnamectl set-hostname ldap.linfra.loc

# Install all available updates.
root@ldap/: apt update; apt upgrade -y

# Add a standard user to the system for everyday operations. Grant sudo.
root@ldap:/# adduser jason
root@ldap:/# usermod -aG sudo jason

# Install the packages that I use regularly on all of my machines.
root@ldap:/# apt install nano net-tools landscape-client man mlocate openssh-server -y

# Configure my static IP's for the LAN and management interfaces.
root@ldap:/# nano /etc/netplan/10-lxc.yaml

network:
    version: 2
    ethernets:
        eth0:
            dhcp4: false
            addresses: [172.16.2.10/24]
            nameservers:
              addresses: [172.16.2.4]
        eth1:
            dhcp4: false
            addresses: [10.130.115.10/24]
            nameservers:
              addresses: [10.130.115.4]
            routes:
            - to: default
              via: 10.130.115.1

root@ldap:/# netplan apply

# Register the new machine with my Landscape server for management.
root@ldap:/# sudo landscape-config --computer-title "ldap.linfra.loc" --account-name standalone --url https://landscape.linfra.loc/message-system --ping-url http://landscape.linfra.loc/ping

# Test internet connectivity.
root@ldap:/# ping google.com
PING google.com (142.250.64.206) 56(84) bytes of data.
64 bytes from (142.250.64.206): icmp_seq=1 ttl=115 time=17.6 ms
64 bytes from (142.250.64.206): icmp_seq=2 ttl=115 time=17.0 ms

--- google.com ping statistics ---
2 packets transmitted, 2 received, 0% packet loss, time 1006ms
rtt min/avg/max/mdev = 17.021/17.312/17.604/0.291 ms
Setting up DNS
Within my lab, I have also already built and configured Bind9 DNS server (ns1.linfra.loc | ns2.linfra.loc) to perform name resolution within the lab. It is always a good idea – even a requirement – to have name resolution functioning within your environment, even more so in production environments. If you decide to not use DNS, host file entries should work as well, they are just more painful to manage. Here I am going to add the necessary DNS records for my LDAP server to the zone files on my DNS server.
# Connect to my DNS server
jason@apollo:/$ ssh [email protected]

# Edit my main DNS zone file and add records for my LDAP server.
jason@ns:/$ sudo nano /etc/bind/zones/db.linfra.loc

# DONT FORGET to increment your serial number!
;
; BIND data file for local loopback interface
;
$TTL    604800
@       IN      SOA     linfra.loc. admin.linfra.loc. (
                             10         ; Serial
                         604800         ; Refresh
                          86400         ; Retry
                        2419200         ; Expire
                         604800 )       ; Negative Cache TTL

; ## LOCAL LAN CONFIGURATION ##

; Nameserver records
        IN      NS      ns.linfra.loc.

; 172.16.2.0/24 - A Records
apollo.linfra.loc.      IN      A       10.130.115.1
ns.linfra.loc.          IN      A       172.16.2.4
ns.linfra.loc.          IN      A       10.130.115.4
splunk.linfra.loc.      IN      A       172.16.2.3
splunk.linfra.loc.      IN      A       10.130.115.3
access.linfra.loc.      IN      A       172.16.2.8
access.linfra.loc.      IN      A       10.130.115.245
ansible.linfra.loc.     IN      A       172.16.2.9
ansible.linfra.loc.     IN      A       10.130.115.9
ldap.linfra.loc.        IN      A       172.16.2.10
ldap.linfra.loc.        IN      A       10.130.115.10
landscape.linfra.loc.   IN      A       172.16.2.109
landscape.linfra.loc.   IN      A       10.130.115.242

# Edit my PTR zone files and add records for my LDAP server.
jason@ns:/$ sudo nano /etc/bind/zones/db.2.16.172

# DONT FORGET to increment your serial number!
;
; BIND reverse data file for local loopback interface
;
$TTL    604800
@       IN      SOA     linfra.loc. admin.linfra.loc. (
                              8         ; Serial
                         604800         ; Refresh
                          86400         ; Retry
                        2419200         ; Expire
                         604800 )       ; Negative Cache TTL
;
; ### NAME SERVER CONFIGURATION ###

; NS records
        IN      NS      ns.linfra.loc.

; PTR records
4       IN      PTR     ns.linfra.loc.          ;172.16.2.4
3       IN      PTR     splunk.linfra.loc.      ;172.16.2.3
8       IN      PTR     access.linfra.loc.      ;172.16.2.8
9       IN      PTR     ansible.linfra.loc.     ;172.16.2.9
10      IN      PTR     ldap.linfra.loc.        ;172.16.2.10
109     IN      PTR     landscape.linfra.loc.   ;172.16.2.109

# Edit my PTR zone files and add records for my LDAP server.
jason@ns:/$ sudo nano /etc/bind/zones/db.115.130.10

# DONT FORGET to increment your serial number!
;
; BIND reverse data file for local loopback interface
;
$TTL	604800
@	IN	SOA	linfra.loc. admin.linfra.loc. (
			      8		; Serial
			 604800		; Refresh
			  86400		; Retry
			2419200		; Expire
			 604800 )	; Negative Cache TTL
;
; ### NAME SERVER CONFIGURATION ###

; NS records
	IN	NS	ns.linfra.loc.

; PTR records
2	IN	PTR	apollo.linfra.loc.	;10.130.115.1
3       IN      PTR     splunk.linfra.loc.      ;10.130.115.3
4	IN	PTR	ns.linfra.loc.		;10.130.115.4
9	IN	PTR	ansible.linfra.loc.	;10.130.115.9
10	IN	PTR	ldap.linfra.loc.	;10.130.115.10
242	IN	PTR	landscape.linfra.loc.	;10.130.115.242
245     IN      PTR     access.linfra.loc.      ;10.130.115.245
Install OpenLDAP
Up to this point, I have done all of the necessary prep work to get the server ready to be an LDAP server. Now I need to install OpenLDAP, perform any initial configuration tasks and test to ensure it is functioning as expected.
# Install OpenLDAP and LDAP Utilities
jason@ldap:~$ sudo apt install slapd ldap-utils

# Configure logging for slapd:
jason@ldap:~$ sudo nano /etc/ldap/slapd_logging.ldif

dn: cn=config
changetype: modify
replace: olcLogLevel
olcLogLevel: stats

# Add the logging configuration to your LDAP database
jason@ldap:~$ sudo ldapmodify -Y EXTERNAL -H ldapi:/// -f /etc/ldap/slapd_logging.ldif
After answering any applicable questions and completing the installation, you will have a vanilla install of OpenLDAP up and running . To test and ensure that you are able to connect to the directory and list objects within, you can execute the following command(s).
# Display the config DIT
root@ldap:~# ldapsearch -Q -LLL -Y EXTERNAL -H ldapi:/// -b cn=config dn

dn: cn=config
dn: cn=module{0},cn=config
dn: cn=schema,cn=config
dn: cn={0}core,cn=schema,cn=config
dn: cn={1}cosine,cn=schema,cn=config
dn: cn={2}nis,cn=schema,cn=config
dn: cn={3}inetorgperson,cn=schema,cn=config
dn: olcDatabase={-1}frontend,cn=config
dn: olcDatabase={0}config,cn=config
dn: olcDatabase={1}mdb,cn=config

# Display your domain DIT (replace values as appropriate)
root@ldap:~# ldapsearch -x -LLL -H ldap:/// -b dc=linfra,dc=loc dn

dn: dc=linfra,dc=loc
dn: ou=admins,dc=linfra,dc=loc
Configure OpenLDAP TLS
As with any sensitive protocol, it is always best to communicate with the server over an encrypted connection. This is no different with LDAP. In this section, I will configure my new LDAP server to also listen on port 636/TPC using LDAPS (TLS) to ensure that both my client and management connections are secure. Since this is not a production environment, I will be using a self-signed certificate to secure these communications. The LDAP server itself will be the CA and sign the certificates. Adjust the values below to meet the requirements of your environment.
# Install the necessary packages to support TLS (LDAPS)
jason@ldap:~$ sudo apt install gnutls-bin ssl-cert

# Create a private key for the certificate authority
jason@ldap:~$ sudo certtool --generate-privkey --bits 4096 --outfile /etc/ssl/private/ca-ldap.pem

# Create the CA template file
jason@ldap:~$ sudo nano /etc/ssl/ca.info

cn = Linfrastructure
ca
cert_signing_key
expiration_days = 3650

# Create the self-signed public certificate that will be used with LDAPS
jason@ldap:~$ sudo certtool --generate-self-signed --load-privkey /etc/ssl/private/ca-ldap.pem --template /etc/ssl/ca.info --outfile /usr/local/share/ca-certificates/linfra-self-signed.crt

# Add the self-signed certificate to the trusted certificate store
jason@ldap:~$ sudo update-ca-certificates

# Create the private key that will be used with LDAPS
jason@ldap:~$ sudo certtool --generate-privkey --bits 2048 --outfile /etc/ldap/linfra-key.pem

# Create the 'info' file about your CA/Environment
jason@ldap:~$ sudo nano /etc/ssl/ldap.linfra.loc.info

organization = Linfrastructure
cn = ldap.linfra.loc
tls_www_server
encryption_key
signing_key
expiration_days = 365

# Create the server certificate
jason@ldap:~$ sudo certtool --generate-certificate --load-privkey /etc/ldap/linfra-key.pem --load-ca-certificate /etc/ssl/certs/linfra-self-signed.pem --load-ca-privkey /etc/ssl/private/ca-ldap.pem --template /etc/ssl/ldap.linfra.loc.info --outfile /etc/ldap/linfra-cert.pem

# Set the appropriate permissions on the newly created certificates
jason@ldap:~$ sudo chgrp openldap /etc/ldap/linfra-key.pem
jason@ldap:~$ sudo chmod 0640 /etc/ldap/linfra-key.pem

# Create the LDIF configuration/info file for slapd
jason@ldap:~$ sudo nano /etc/ldap/slapd_cert_info.ldif

dn: cn=config
add: olcTLSCertificateKeyFile
olcTLSCertificateKeyFile: /etc/ldap/linfra-key.pem
-
add: olcTLSCertificateFile
olcTLSCertificateFile: /etc/ldap/linfra-cert.pem
-
add: olcTLSCACertificateFile
olcTLSCACertificateFile: /etc/ssl/certs/linfra-self-signed.pem

# Edit your ldap.conf file to add the certificate information.
jason@ldap:~$ sudo nano /etc/ldap/ldap.conf

#
# LDAP Defaults
#

# See ldap.conf(5) for details
# This file should be world readable but not world writable.

BASE    dc=linfra,dc=loc
URI     ldap://ldap.linfra.loc ldap://ldap.linfra.loc:666

SIZELIMIT       12
TIMELIMIT       15
DEREF           never

# TLS certificates (needed for GnuTLS)
TLS_CACERTDIR   /etc/ssl/certs/
TLS_CERT        /etc/ldap/linfra-cert.pem
TLS_KEY         /etc/ldap/linfra-key.pem
TLS_CACERT      /etc/ssl/certs/linfra-self-signed.pem
TLS_REQCERT     ALLOW

# Add the certificate information to the LDAP database
jason@ldap:~$ sudo ldapmodify -Y EXTERNAL -H ldapi:/// -f /etc/ldap/slapd_cert_info.ldif

# Enable OpenLDAP to accept LDAPS connections (add LDAPS:///)
jason@ldap:~$ sudo nano /etc/default/slapd

SLAPD_SERVICES="ldap:/// ldapi:/// ldaps:///"

# Restart LDAP daemon.
jason@ldap:~$ sudo systemctl restart slapd

# Test StartTLS connectivity to the server
jason@ldap:~$ ldapwhoami -x -ZZ -H ldap://ldap.linfra.loc
anonymous

# Test LDAPS connectivity to the server
jason@ldap:~$ ldapwhoami -x -H ldaps://ldap.linfra.loc
anonymous
Once you have completed the steps above and testing StartTLS and LDAPS has returned ‘anonymous’ (indicating that the connection was successful), you have properly configured your OpenLDAP server to accept encrypted connections.
Some pitfalls to avoid
As with any manual build, there will be issues. The same is the case for myself, particularly with configuring TLS above. It seems that the first go around trying to configure the certificates, I must have mixed them up and was unable to successfully connect to the server using StartTLS or LDAPS – resulting in the following error. If you see such an error, just know that the certificates are somehow not configured properly. I wasted a lot of time figuring this out before just starting over with the TLS configuration all together.
# Error at the CLI
jason@ldap:~$ ldapwhoami -x -ZZ -H ldap://ldap.linfra.loc
ldap_start_tls: Connect error (-11)

# Error in /var/log/syslog
ldap slapd[27903]: conn=1000 fd=14 closed (TLS negotiation failure)